I’m digitizing Vinyl LPs, which is basically similar to what you are doing. And I had some issues getting started, so I feel your pain.
I assume that you are using a Mac. When you open Audacity (version 3.1.2), there will be a row of pulldowns above a big grey “recording surface”.
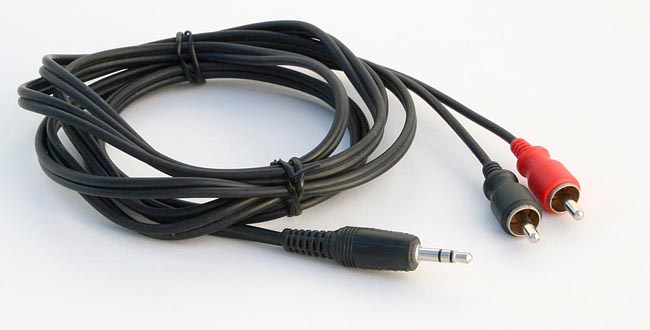
On the left, select “Core Audio”. On a Mac, it’s your only choice. Moving right, next to the microphone, select your input device, which in your case will be the Behringer UCA202 U-Control. Whether this will show up as “Unknown USB Audio Device” or something more intelligible, I don’t know.
The third pull-down should be Mono or Stereo, depending on your original source. The Behringer can handle stereo, but your tapes may not have stereo on them.
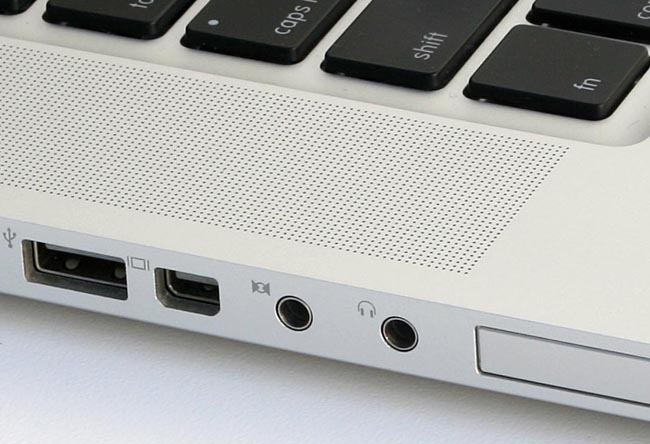
The final pull-down is the sound output device. I strongly recommend that you connect a good pair of headphones to your computer, using a wire, not bluetooth. This is so that you can monitor what Audacity is actually “hearing” as it records your input. I found that bluetooth had noise and dropouts, which made it impossible to know what was actually in my digital recordings.
Once you have set up the inputs and outputs, press the record button on Audacity — the square button with the big red dot in it, near the top left. This starts Audacity recording. A new mono or stereo track will appear on the recording surface. Next, start your tape player playing. You should see a waveform start to appear.
I failed to record any sound the first few times I tried. It turns out that the problem is that MacOS requires you to give permission to an app to access a microphone, or other audio input device. You allow this in System Preferences > Security & Privacy > Microphone. Without granting this permission, on one of my computers, I got no error, but no sound; on the other, I got a warning saying that Audacity would like to access the microphone, and just clicked an “OK” button. No, I can’t explain why the two computers behaved differently. Note that you have to grant access to “Microphone” even though you are recording from the Behringer, not from a microphone.
Once you can see the waveform, you are good to go! Press the “stop” button (the square button with a black square inside) to stop recording. There is also a pause button, which does the obvious thing (or you can type “p”).
There is a setting in Audacity > Preferences > Recording to enable “Sound Activated Recording”. This will automatically pause recording when there is no sound input, and restart it when there is once again sound. This is handy so that you don’t have to sit and watch Audacity as it records; it will pause recording at the end of the tape, or when you have to turn the tape over. The slider in this preference controls what Audacity thinks is “silence” and what it thinks is “sound”: because there will always be some background noise, Audacity never hears true silence. For recording Vinyl, I found that a setting of -45 dB worked pretty well; you may have to experiment. You don’t want recording shutting off in quiet passages of music, or gaps between speakers in a conversation.
As you record, watch the recording level at the top of the screen. You may have to adjust the recording level (slider near the top right, by the microphone icon) to avoid clipping. The occasional yellow highlight in the recording level meter is OK, but if you see much red, stop recording, delete your track (Cmd-A, delete), adjust the recording level, and try again. As with a tape recorder, you can check the recording level with recording “Paused”. There is an “Analyze > find clipping” tool which will detect places where the volume is so high that Audacity runs of of headroom. If you get more than a couple of clips, start again with a lower recording volume.
Once you have the digital sound recorded in Audacity, you start the time-consuming part, which is the post processing. In my case, for digitizing music from vinyl, I do the following:
- • Remove background noise. Use Effect > Noise Reduction
• Remove Clicks. Use Effect > Click Removal
• Adjust Loudness. Use Effect > Loudness Normalization
• Split into separate songs. Use Analyze > Label Sounds. Here again you have to tell audacity what to regard as sounds, and what as silence. This analysis will add a “Label Track” below your sound track(s). I edit the labels to contain the song names, and carefully adjust the start and end of each labelled region to account for songs that fade to nothing, or segue into other songs.
• Export Multiple. Use File > Export > Export Multiple. This will write several separate audio files, in the format of your choice, to your disk, one file for each of the labelled regions. In formats that support metadata, it creates the metadata too, using the labels for the song names.
I’ve set up keyboard shortcuts for each of the above operations, but this is still time-consuming, particularly finding the starts and ends of songs. This is where headphones are essential. You may not have to do this — you don’t say what’s on the tapes you are digitizing.
Other useful tips on using audacity are the zoom keys. Cmd-1 zooms in, Cmd-3 zooms out, and Cmd-2 resets to the default zoom level. Most useful: if you select a region with the mouse, then Cmd-e will zoom to that region. Cmd-f will zoom out so that you can see the whole recording.
There is more information on every tool in the Audacity manual, but the above describes the whole process in outline. Once I’m done with an LP, I save the whole Audacity project “just in case” I ever want to go back and do more post-processing. Eventually I may archive them to another disk.
Good luck! Let us know how you get on.