Fade In/Out Plugin

Hi all,

Recently got a project to create some SFX for a TV series.
It involves creating some weird space type effects which I create using noise, tones and existing sound clips.
(Which I then apply filtering and reverb to, and sometimes reverse or pitch change as well).

However, the noise, clips, etc, need some “creative” level and fade adjustments at certain points.
The current fade in, fade out and amplitude effects in Audacity were taking too much time, so created my own plugin.
It allows arbitrary fades (in and out) and level adjustments of a selection, without the need to use the envelope tool.

Please note that the start and end points are specified in dB (min -30 and max +30) and not in percentages or ratios.
I’m used to thinking in dB’s rather than say 50% or 0.5.

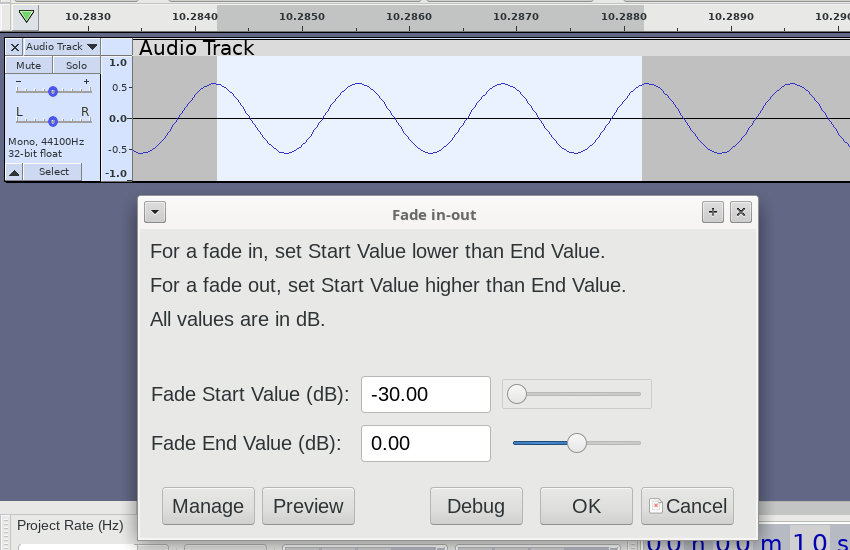
The interface looks like this:
FadesInterface.png
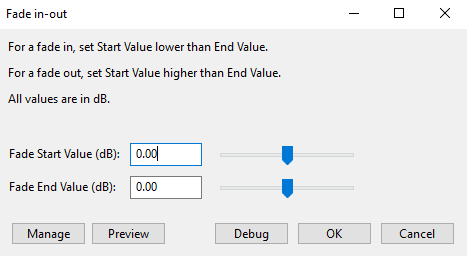
To use, make a selection of the desired audio region, then use the Fade-in-out plugin.
The two controls are pretty self explanatory.

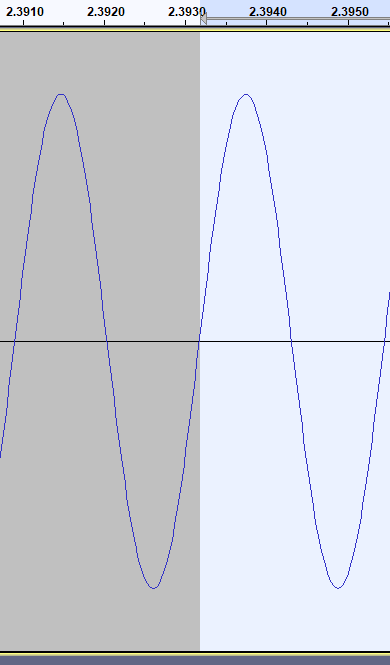
Below then, a few examples of what can be quickly done.
(Please don’t do crazy things like adding 30 dB of gain to a selection that is already at 0 dBFS).

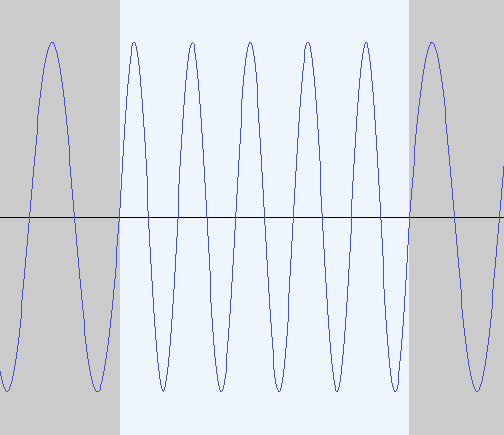
All examples are with a tone of 1 KHz and a level of 1.0 (i.e. 0 dBFS).


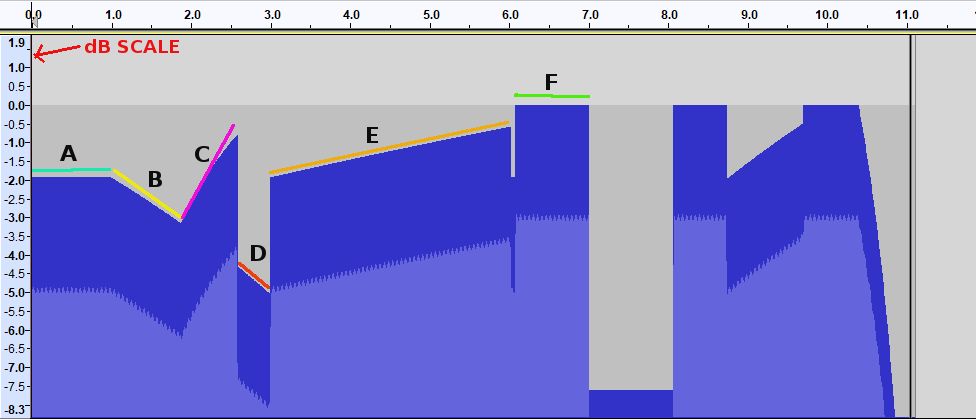
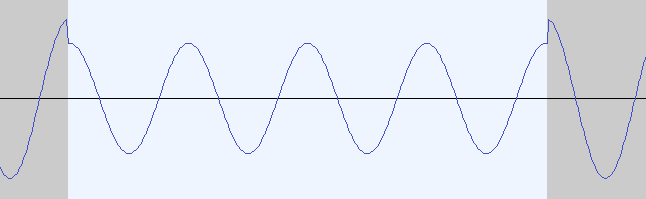
Fade “A” has a start value of -1.95 dB and an end value of -1.95 dB
When the start and end values are equal, the selection will have an equal level from start to end.
It can be a gain or loss.
Same applies to Fade “F” but with values of 0 dB, which means untouched.

Fade “B”, start = -1.95 dB, end = -3 dB (remember that the original audio had a level of 0 dBFS).
Fade “C”, start = -3 dB. end = -1 dB.
And so on.
The very last fade goes from 0 dB down to -30 dB.

Only tested the plugin with Audacity 2.4.2 running on MacOS and Win 10.
No reason why it should not work on any version from 2.3.1 up to the very latest.

Hope it’s useful to others.

Below. updated plugin (version 2 - 01 Jan 2022)
The previous version had a problem with control-srate.
Fade-in-out.ny (1.01 KB)

Works fine here on Audacity 3.2.0 alpha.

If you want to tidy up the code, both of the “get 'selection” lines could be removed.

If you want a bit more flexibility, try the “Adjustable Fade” : https://manual.audacityteam.org/man/adjustable_fade.html

Steve wrote:

Works fine here on Audacity 3.2.0 alpha.

Excellent.
BTW, why are you up at this time of night testing Nyquist code? :laughing:

If you want to tidy up the code, both of the “get 'selection” lines could be removed.

Thanks Steve, it was a “quick and dirty” hack, so yes, it could be optimized.

The Adjustable fade plugin looks very handy, thank you for the link.

I’m listening to a radio show: “Roots Reggae and Rebellion” :wink:

There is a small problem when you fade in with the plug-in.

Here’s the selection and the settings:

after.png
and the result:

before.png

Uhmm, interesting, will check it out.

For one way to fix it, look at the “Linear fade in, out” function (linear) in the Adjustable Fade code (https://github.com/audacity/audacity/blob/master/plug-ins/adjustable-fade.ny)

Yep, will look at that.
Never picked up on it as I always use “At Zero crossings” every time I do any selection.


You do know you can use Audacity to Timer Record that overnight - and then you can listen to it later Steve ? :wink: :sunglasses: :nerd:

Peter.

Yes, but I can’t Timer Record the glass of Baileys :wink:

But, you can time your Baileys intake… :wink:
Screen Shot 2021-12-31 at 12.14.31 PM.png

Steve wrote:

There is a small problem when you fade in with the plug-in.


Just tried several effects that ship with Audacity, they all create similar problems when the
selection does not start and stop on a zero crossing.

Here are two of them:

Amplify effect:
AmplifyEffect-NoZeroCrossing.png
Pitch effect:
ChangePitch-NoZeroCrossing.png
Best practice is always to press Z before applying any effect to a selection.

Pitch effect repeated at zero crossings, nice and clean.
ChangePitch-AtZeroCrossing.png

In this case, the glitches at the ends are expected because it’s doing exactly what you told it to do.


In this case it is a limitation of the (very complex) pitch change algorithm. Ideally this would be smooth at the ends, or at least smooth at the start. It may not be possible for the transition to be smooth at the end without applying a crossfade because it’s likely that the phase of the waveform will be different from the original.


In the case of the new Fade effect, the problem is that it is not doing what it was told to do. The settings tell the effect to fade up to unity gain, but it actually does a little fade-out at the end. The reason that this happens is because Piecewise Linear Approximations (the “PWL” family) produce a control signal at the control signal sample rate control-srate. By default, control-srate is 1/20th of the sample rate (this can give better performance for some plug-ins as a low sample rate control signal will have only 1/20th of the samples compared to what it would have at the sound sample rate).

Try this:

(format nil "Sound sample rate = ~a Hz.~%Control sample rate = ~a Hz." *sound-srate* *control-srate*)

With the setting “-30” and “0”, the code effectively boil down to:

(setf val-start (db-to-linear -30))
(mult *track* (pwlv val-start 1 1))

If we force the sample rate of the control signal back to the track sample rate, then we can see the control signal on its own:

(setf val-start (db-to-linear -30))
(force-srate *sound-srate* (pwlv val-start 1 1))

and if we zoom in on the end of the ramp that is produced, we can see the problem clearly:

First Track001.png
The final sample at the control sample rate is earlier than the final sample at the sound sample rate. One way or another, the control signal must be coaxed into maintaining the correct level up to the final sample in the selected sound.

One way to do that is to set the control-srate the same as sound-srate:

(setf *control-srate* *sound-srate*)
(setf val-start (db-to-linear -30))
(mult *track* (pwlv val-start 1 1))

Another way is to force the evaluation of PWLV at sound-srate:

(setf val-start (db-to-linear -30))
(mult *track*
      (control-srate-abs *sound-srate* (pwlv val-start 1 1)))

and another way is to slightly extend the control signal so that it doesn’t run out of samples at the end:

(setf val-start (db-to-linear -30))
(setf val-end 1)

;; Extend the control signal by  1.5 samples
(setf end (+ (get-duration 1) (/ 1.5 *control-srate*))) ; length plus 1.5 samples at *control-srate*
(setf end (/ end (get-duration 1))) ; scale to warp factor
(mult *track* (pwlv val-start 1 val-end end val-end))

or slightly less code:

(setf val-start (db-to-linear -30))
(setf val-end 1)
;; 1.5 samples at control rate = 30 samples at sound rate
(setf end (/ (+ 30 len) len))
(mult *track* (pwlv val-start 1 val-end end val-end))

My preferred solution is using control-srate-abs. It’s simple, clear, and there isn’t a performance hit because every sample in track has to be processed regardless of the low control signalsample rate.

Steve wrote:

By default, control-srate is 1/20th of the sample rate

Very interesting about control-srate being different to sound-srate.
Can see now why it runs out of samples at the end.

I had, wrongly, assumed that they are one and the same.
That actually can be very handy as control-srate could, in theory, be set to any reasonable value.

Let me wrap my head around your code snippets and will revert later.

The hangover has subsided, so back to the plugin.

Steve, looked at your examples, and the one that made most sense to me,
was the last one.
So have updated the code accordingly.

Before I update the original post, are you happy with it?

(setf val-start (db-to-linear val-start))
(setf val-end (db-to-linear val-end))

;; pwl(v) rate is 1/20 of sample rate, so to avoid running out of samples at the end,
;; add 1.5 samples at control rate = 30 samples at sound rate (20 x 1.5 = 30)

(setf end (/ (+ 30 len) len))
(mult *track* (pwlv val-start 1 val-end end val-end))


Looks good to me.

When you modify an earlier post, make it clear that the modification is an update (so that the rest of the discussion makes sense).

Original link updated with new version and explanation.