Your overall recording level is way too high.
How is the Ecler Nuo 5 connected to the computer?
You need to lower the record level so that the maximum peaks are about half of the track height.
When you’ve done that (or ask if you need help doing that) please post a new screenshot.
Screenshots can be uploaded directly to this forum (see “Upload Attachment” below the message composing box).
When the picture file is uploaded you can insert it “in line” into your post.
Click the speaker icon by the system clock > Recording Devices, then right-click over the line-in for the Numark > Properties. On the “Levels” tab, turn the input slider down (there may also be a balance control there to correct the channel imbalance). Double-check you are not connecting the mixer to the mic input, that would explain the excessive level.
If you cannot correct the balance problem using the mixer or “Levels” you can use Effect > Normalize in Audacity to do so but that will not correct any clipping distortion you may have due to excessive input level.
If you are hardware monitoring them in the mixer, possibly they do. The point seems to be that you need to correct the excessive input level after the recordings have gone through the Numark.
Have you tried the suggestions in my last post?
Is the sound also unbalanced between channels? If not then you can blame Numark for that. Presumably you can also increase its input level in Windows as I suggested?
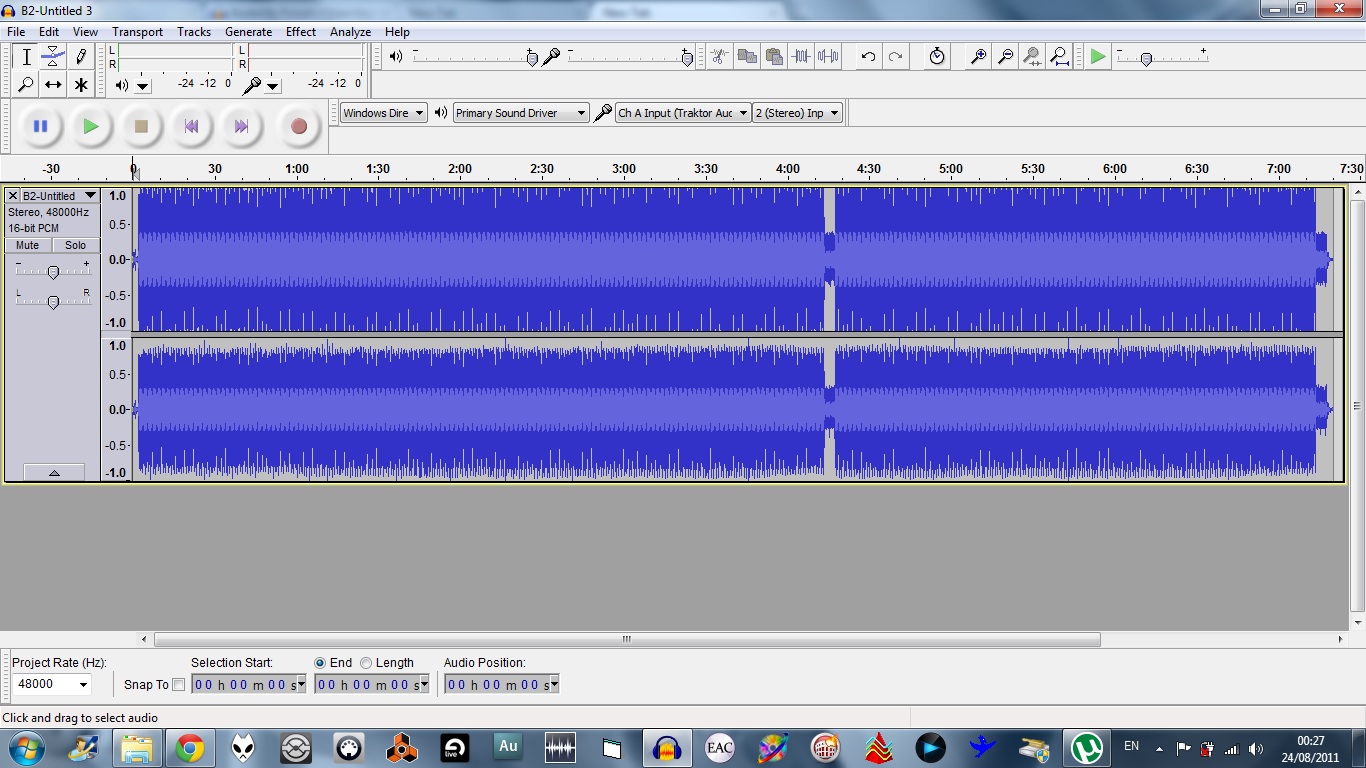
The recording level is too high. Both channels are touching the top/bottom of the track and will be clipped (distorted) at those points (if it does not sound bad, then it’s just not clipped to badly, but it will be clipped).
The right (lower) channel does appear to be recorded at a lower level, but it’s impossible to see exactly what is occurring until you have a recording that is not clipped.
Also, I’d highly recommend that you change the default sample format back to 32-bit float (Edit menu > Preferences > Quality)
If the final destination of your recording is for CD, then it would also be best to change the default sample rate back to 44100 Hz.
We don’t understand what is preventing you turning down the input level.
The Audacity input slider in your last image is on maximum but not greyed out, indicating you can use it to reduce the input level. This will prevent loss of audio data in the recording, while still letting you Effect > Normalize it afterwards to the maximum 0.0 dB without data loss if you wish. Effect > Normalize will also correct the channel imbalance - it will scale both channels to 0.0 dB so that the peak volume in each channel is at that level.
If you find after that the tracks do not sound loud or “punchy” enough, you can try Effect > Compressor to reduce the difference between loud and soft in the recording.
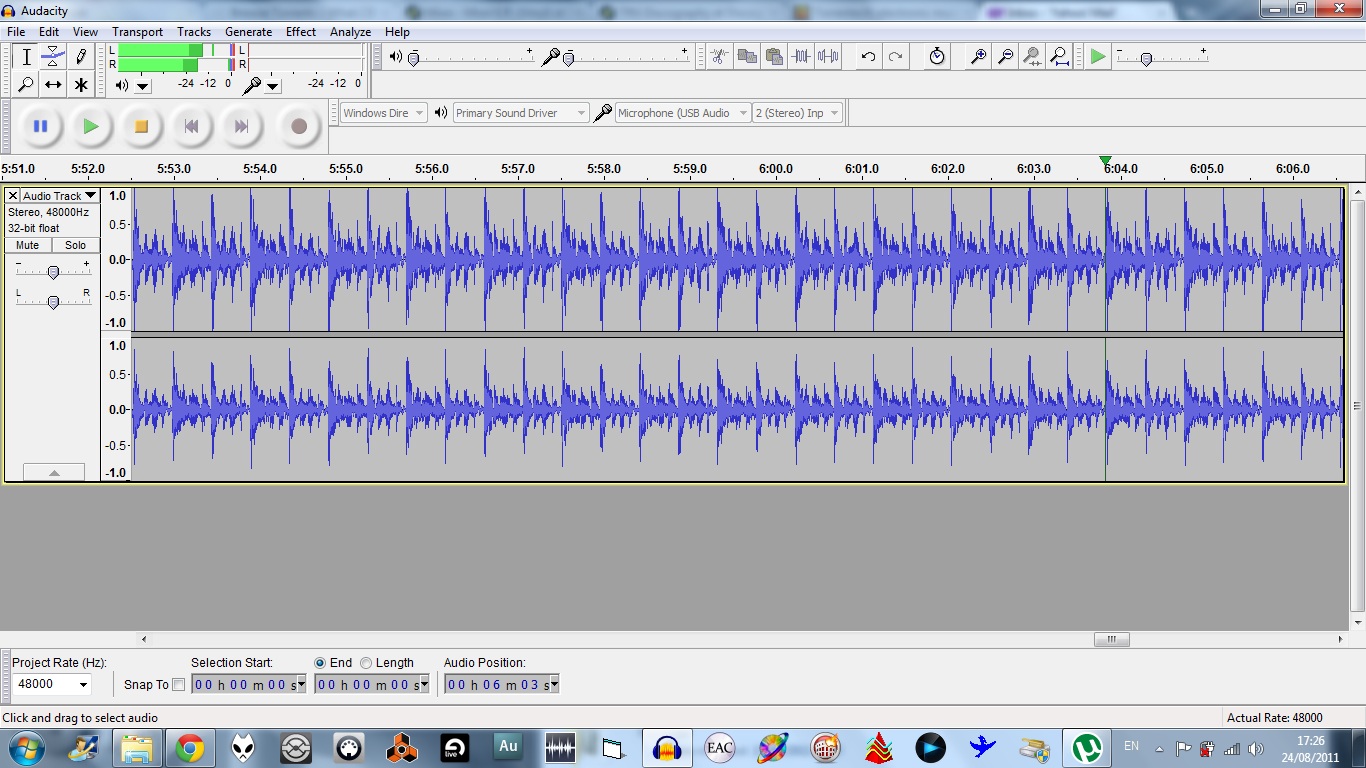
Picture Above Is The Latest Recording I Did (Still The Lower Waveform Seems To Be Slightly Smaller) I Dont Know If This Is Much A Problem As The Sound Seems Fine To me…
BTW…This Is Dance Music Now That I Am Recording…
Last Question About Normalize:
A Friend Told Me To Record My Songs At -2 On the mixer,Then Normalize It To 0 db To Get That Digital Effect (I Dont know If This Is True)
Remove Any Dc Offset…I Keep This Option Unticked Yes?
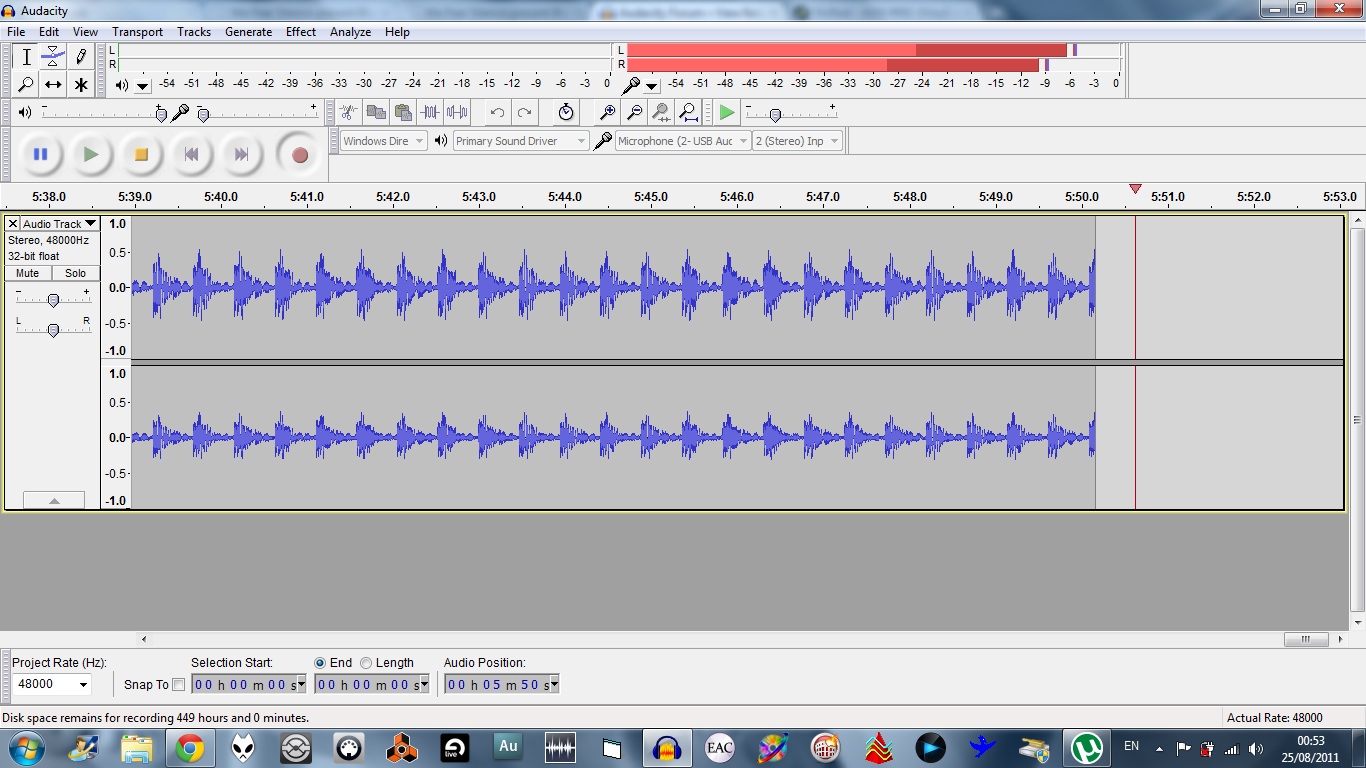
If that is as it is recorded, then the recording level is still too high. You need to be able to see clear daylight between the top bottom of the blue waveform and the top/bottom of the track.
If you look at the Green meter bar near the top, those two little red marks are “clipping indicators”, showing that the audio is clipped on both left and right channels.
It would probably help if you click on the right edge of the meter toolbar and drag it over to the right. You can make the meters full screen width which makes it a lot easier to see the recording and playback levels.
After you have turned the levels down a bit more on the mixer (so that you have some space above and below the waveform and do not get any red clipping lines on Meter Toolbar), then Effect > Normalize is good. If you are making an audio CD, -1 dB would be better than 0 dB because some CD players can distort at 0 dB even though they shouldn’t.
You can just leave “Remove any DC offset” checked (on) - you can’t trust you do not have offset given you are already recording unbalanced, though you do not have any serious offset from the centre zero position according to the image.
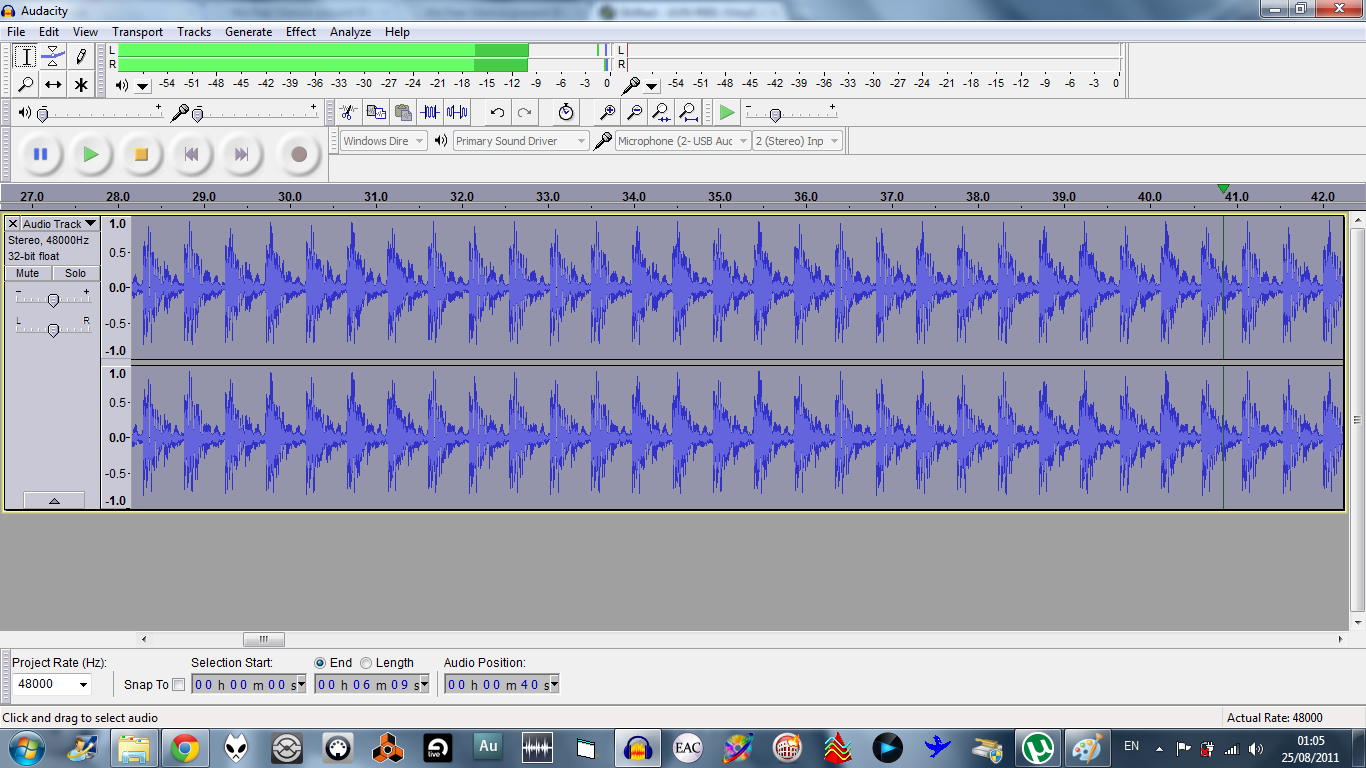
Congratulations - got there in the end
While you are recording, a peak level of around -6 dB is ideal. In the days of tape recording it was important to push the recording level as high as possible because the “noise floor” of tape was relatively high, but not so with digital recording. The digital noise floor is extremely low, so you can afford to leave a little head room. Also, tape was quite forgiving if the recording was recorded a bit too loud, whereas digital distortion is much less forgiving.
Now that we can see all of the waveform you’ll notice that the difference between the left and right channels was only about 4 dB, which is about enough to be noticeable on a good playback system, but really is not very much at all. So yes it was worth fixing, but it doubt that it was very noticeable unless you were really listening for it. I would guess that the “out-of balance” looked a lot worse than it sounded.
Unfortunately, clipping is notoriously difficult to repair. In most cases, “repair” will cause as much damage as it fixes, so it’s usually not worth the time and trouble, as doing a good repair job is likely to take at least as much time and effort as re-recording.
Unlike tape distortion that “squashes” peaks if they go too high, digital clipping literally “chops off” the waveform at +/- 1. Any peaks that try to exceed the 0 dB limit are totally missing. To “repair” digital clipping requires that the repair tool can physically know what the missing part should be.
For very simple waveforms such as sine waves, the “Clip Fix” effect can make a reasonably good guess at what the missing part should have been, but on more complex waveforms it really does not stand a chance.
This difficulty is why we stress that it’s better if the original recording is a bit low (easy to adjust with Amplify or Normalize), rather then too high (near impossible to make a perfect fix).
“Recording” is a skill (even “simple” vinyl to digital transfers) and the more you do, the more expert you will become at it.
It’s not difficult to transfer vinyl to CD, but there’s a lot of tips and tricks to making a really good professional quality job of it, which is why there’s a lot written about it in the documentation (for example this tutorial http://manual.audacityteam.org/man/Sample_workflow_for_LP_digitization ).
I totally endorse this statement entirely. My biggest mistake when I started out as a keenie newbie was to start right off with my favourite LPs and singles - so when I got better later I felt I just had to go back and redo those. My advice would always be to start out with some LPs that you care less a bit and only ever played infrequently. On thinking about it I may just add this advice to the tutorials …