I am attempting to test different commands within a chain to see the result on MP3 music files downloaded over the years. My problem is that only the first command seems to run, followed by the export. The sequence is as follows:
01 NotchFilter, 02 Normalize, 03 Amplify, 04 ExportMP3, 05 -END-
When I apply the above chain, I see the NotchFilter run normally with the progress shown, followed by immediate export. I am testing this on two files only at this point. I have applied the chain and verified the files are exported correctly to the “cleaned” folder. I then manually run the three effects; Notch Filter, Normalize, and Amplify on the original two unedited source files. Afterward I import all four of the edited files into Audacity and compare their Waveforms. The two chained files from the cleaned directory show the effect of the Notch Filter, but not the effects of the Normalize and Amplify steps. This is obvious when compared with the two files that I ran the steps on manually. The peaks and valleys are similar but the overall loudness is different. Am I doing something wrong in constructing the chain? I don’t mind constructing three chains and running each in order but the Chain interface doesn’t appear to suggest that this should be necessary.
All effects are used with default settings, while the ExportMP3 is stereo 320 (the same as the original unedited files). Sound quality is acceptable on all. I’m not sure if these are the best effects to use but the NotchFilter seems to add some dynamic range on certain files (while doing little where that already exists), while the normalize and amplify steps seem the best way to minimize loudness differences. I’m no audio expert so there may well be better ways. My main concern is the chain.
It is pointless running both Normalize and Amplify one after the other. Generally you should just us Normalize.
Both of these effects are very closely related. Both effects adjust the level of the audio, but they do it in slightly different ways.
The Normalize effect adjust the level so that the maximum (highest or lowest) peak reaches the specified level. It amplifies to a specified level.
The Amplify effect adjusts the level by a specified amount.
Both effects are able to increase, or decrease the level, according to the settings that you use.
The default setting for Normalize is to make the maximum peak level exactly -1 dB. That is just below maximum level that can be achieved without clipping (distorting) the audio (it allows a little “headroom” as a safety margin).
The Normalize effect has a couple of additional features that are described in the manual: Audacity Manual
When running the Amplify effect normally (not in a Chain), the effect automatically adjusts its default value so as to apply the right amount of amplification to bring the peak level to exactly 0 dB (the absolute maximum without clipping). However, the behaviour in a Chain is different. The amount of amplification (how many dB louder or quieter) is written into the Chain.
On running both normalize and amplify (in that order), my reason was due to what I observed after normalization only on two dissimilar files.
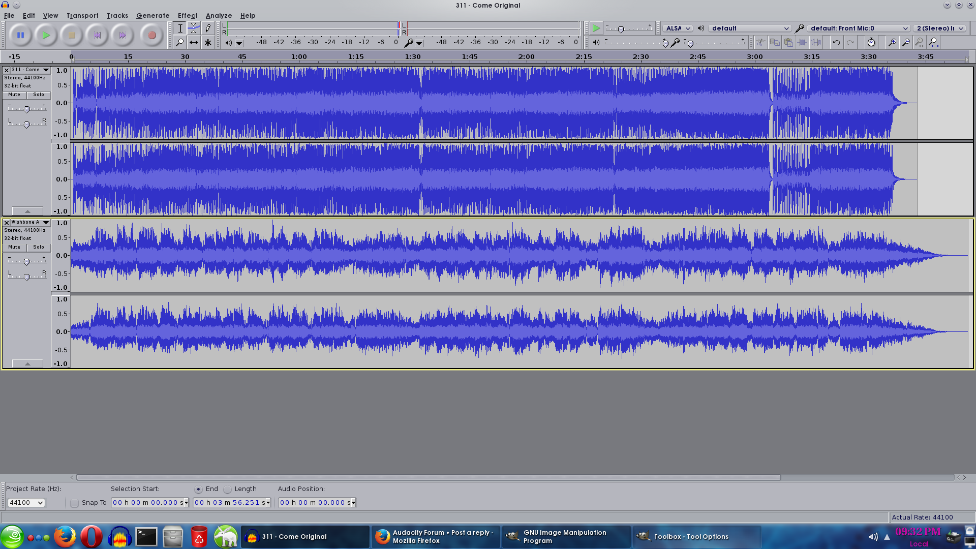
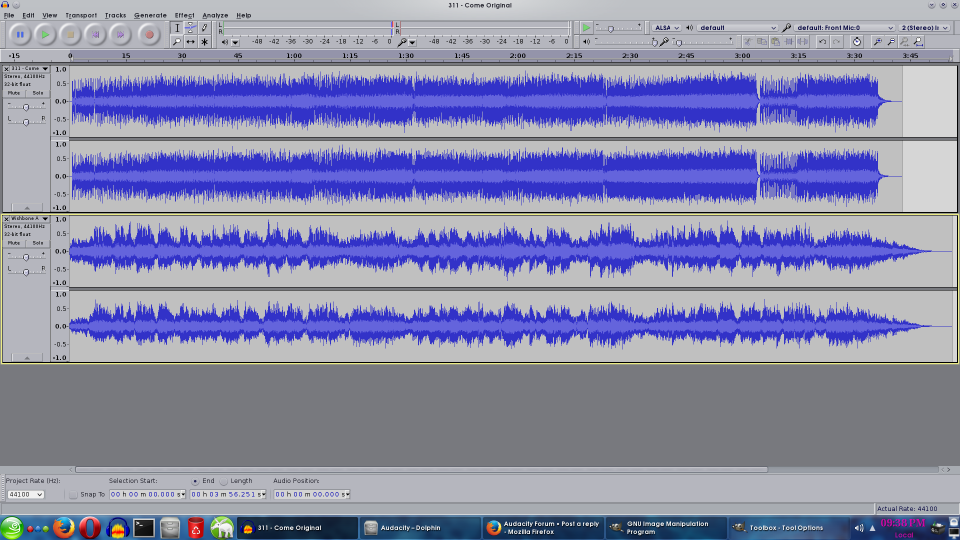
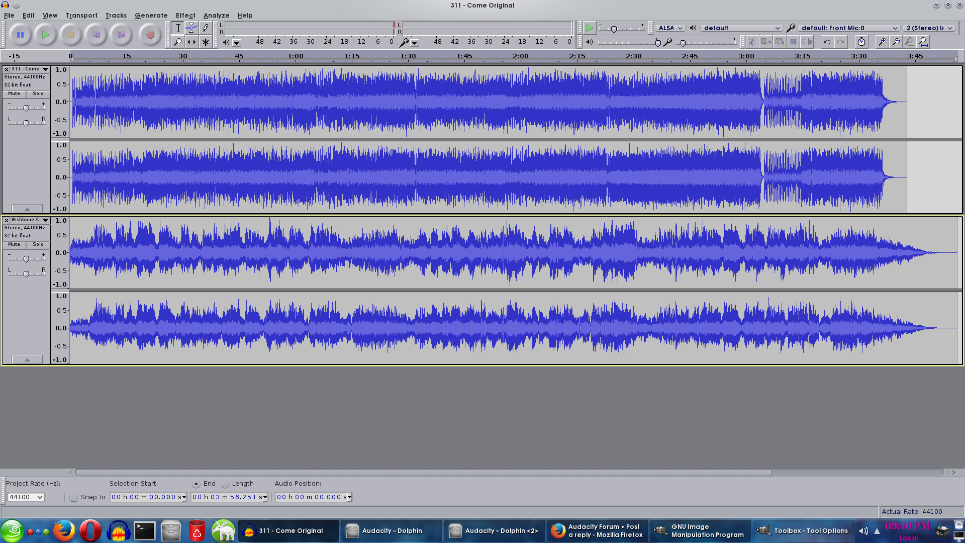
In this case, the files were 311 - Come Original (modern rock type song), and Wishbone Ash - Leaf and Stream (1971 acoustic softer rock). I’ve attached four images which show the waveforms after each step, with the 311 song on top and the Wishbone Ash song on the bottom in each. While the normalization step accomplished what was expected, I wanted the amplification step afterward to increase the loudness on both as much as much as possible without introducing any clipping.
Like I mentioned in my first post, I’m learning as I go so I certainly appreciate any suggestions on simplifying what I’m trying to accomplish (improving the dynamic range where needed and avoiding large differences in loudness between files).
And I did notice the difference you mentioned when I looked at parameters on amplify when in a chain, versus when I ran the same effect manually. I prefer the manual parameter behavior, not sure I really understand the reason for the other.
Note that “lossy” compressed formats (such as MP3, WMA, AC3, …) are “inexact”, so even if the maximum peak level before you export is exactly 0 dB, there may be an occasional sample clipped after exporting due to the inexact nature of the encoding. For this reason it is generally recommended to allow a little headroom (Normalize a little below 0 dB).
As “dynamic range” is about the range of difference between loudest and quietest sounds, the overall effect of increasing the dynamic range makes the overall level quieter. This comes as a surprise to many. Commercial recordings usually have the dynamics compressed so that they sound louder. (“dynamic compression” is not to be confused with “data compression”. The latter is just about making files smaller.)
If I have a bunch of files and I want to reduce their amplitude by 1/2 (-6 dB), then I would use Amplify.
The Amplify effect allows us to set how much we want to change the gain by. In this case “-6 dB”. The minus sign indicates that we are amplifying to a lower level.
If I have a bunch of files and I want to change their peak amplitude so that they all peak at -6 dB, then I would use the Normalize effect.
The Normalization effect allows us to set a target level. In this case I would normalize to -6 dB.
<<That is exactly what Normalizing to 0 dB does.>>
And thanks to your very concise explanation I now understand why that is true. Thanks.
<<As “dynamic range” is about the range of difference between loudest and quietest sounds, the overall effect of increasing the dynamic range makes the overall level quieter. This comes as a surprise to many. Commercial recordings usually have the dynamics compressed so that they sound louder. (“dynamic compression” is not to be confused with “data compression”. The latter is just about making files smaller.)>>
This also makes sense and was my goal with the original 311 track, and I was a bit surprised how much the overall level was dropped after the notch filter was used in the first step. But following with the normalize step seemed to help recover some of that. The notch filter seemed to have much less effect on the Wishbone Ash track, and wasn’t really needed anyway. I’m not sure if the notch filter was a good choice or if I should be looking at something like the low pass filter for tracks that seem lacking in dynamic range. The 311 track did sound better afterward but since I was just experimenting I’m certainly willing to believe there might be better filtering choices.