I need some assistance with volume control

Running Debian Buster (up to date) Audacity 2.2.2 from distribution release

I am trying to take an audio track from a video (from Youtube) and adjust it so that the volume when played is always the same. Most people simply adjust the volume up or down when it is required, but I am playing these videos on a remote computer for my 91 year old mother that can’t manage to do that any more.
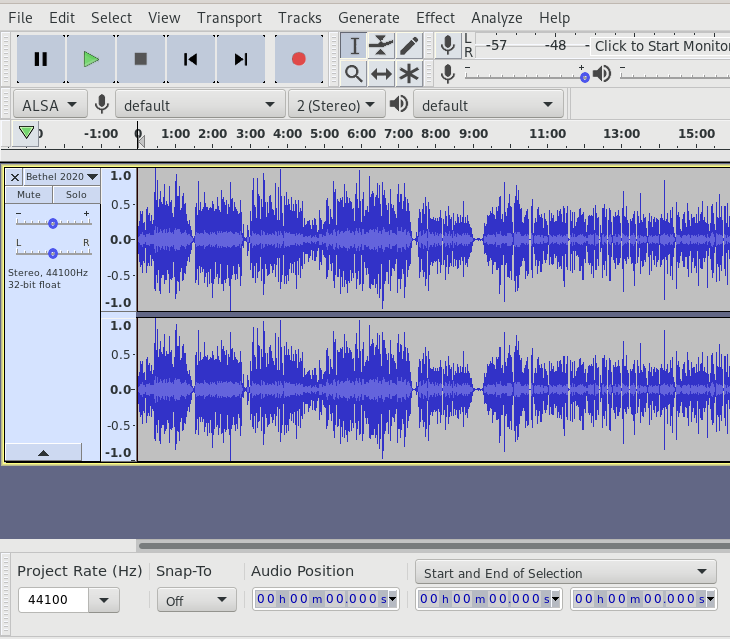
I can’t hear the volume that is being played on the speakers remotely, so I need to set all the sections of the audio track to the same relative volume and then amplify so that it is loud enough for her to hear it but not disturb the other residents in the nursing home. I don’t know a great deal about audio editing, but I have managed to get the output from Audacity to be at a consistent volume by amplifying a negative DB amount for the really loud sections and amplifying a positive DB amount for the quiet sections.

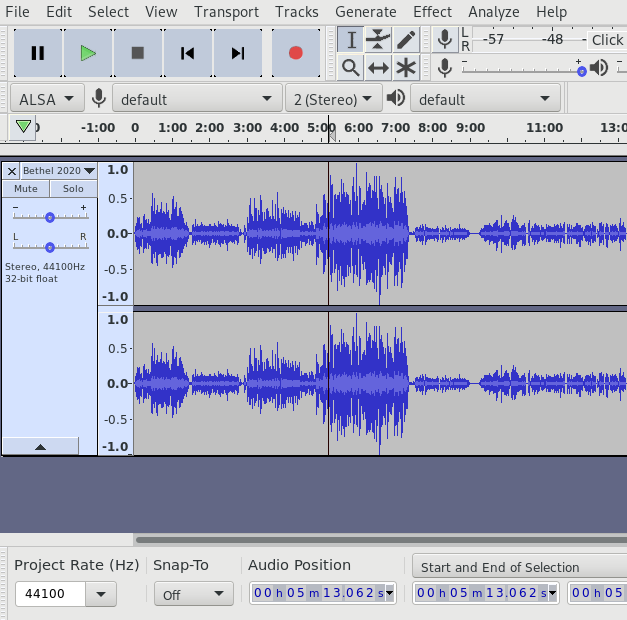
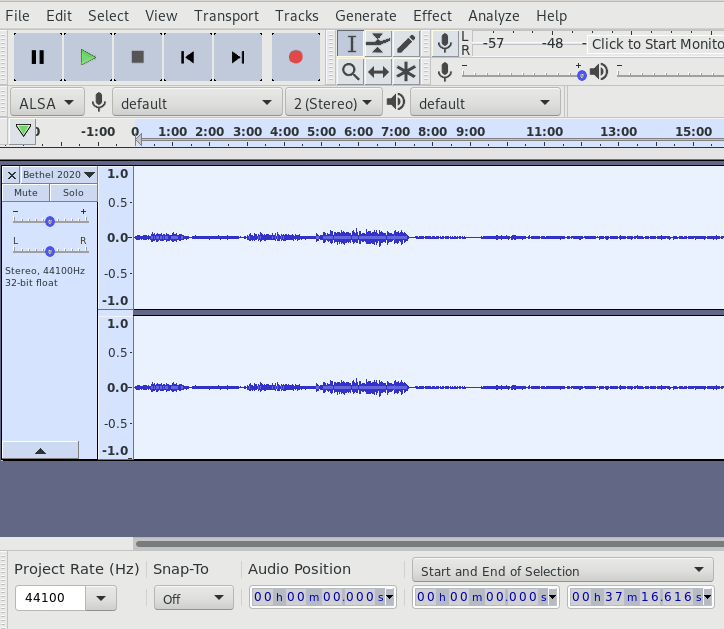
I have attached a screenshot of a typical file as I get it (Audacity.png) and what it looks like after applying maximum amplification (Audacity-1) and what it looks like after I try to make all sections about the same level (Audacity-2). The problem is that each source is different in volume and so some results are quieter than others.

I have googled for a tool to show the volume of a file, but have not been able to find one that will show me what the actual volume is for a particular file, only how the volume changes in the file.
Can anyone give me some keywords to search for in google that will find a tool to show actual volume of a file?
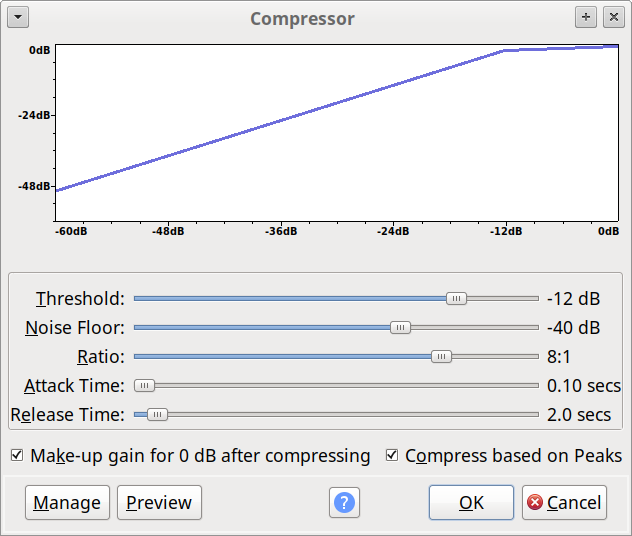
Is there a way in Audacity to set the volume instead of just amplifying +/- xDB?
Am I just taking the wrong approach to the problem?

Any assistance would be greatly appreciated.
Ole.
Audacity-2.png
Audacity-1.png
Audacity.png

There’s two main issues here:

  1. Maintaining a fairly constant level within one track / file.

  2. Matching the volume of multiple tracks / files to approximately the same level.


That’s one way to manually deal with the first issue.
A possibly better way is to use the Envelope Tool: Envelope Tool - Audacity Manual
(It’s worth playing with the envelope tool to familiarise yourself with it, even if you don’t use it much).

There’s also a semi-automatic way to do this, which is to use the Compressor effect: Compressor - Audacity Manual
This effect is a bit tricky to use, but I’d suggest this workflow as a starting point:

  • First, select the entire track and “Amplify” effect with default settings.
  • Then apply the Compressor effect with these settings:


The result will probably sound very loud, but we’ll deal with that in “issue 2”.


The thing that makes this tricky is that even if we give all files the same peak amplitude (the same height peaks), then some files will still probably sound louder or quieter than others. Peak level is not a good measure for “loudness”.

Later versions of Audacity have a “loudness” normalizing effect, but that’s not available for Audacity 2.2.2. However, there is a plug-in for normalizing files to approximately the same loudness. Try the “New Version” of the plug-in from here: ReplayGain plug-in
I’d recommend using it with default settings.

There are some things you can do, but before I get started, there is an “issue” with any kind of “volume matching”. The peak levels limit how loud you can go without clipping (distortion) but the peaks don’t correlate very well with perceived loudness. So we end-up with lots of quiet-sounding files that can’t be boosted without clipping. That means you mostly have to reduce the loud files. And, if you reduce the volume enough to match the quietest files, everything ends-up too quiet. So, it’s a compromise and some people still complain about the volume reduction but if you have enough analog gain you can turn-up the analog volume to compensate.

I am trying to take an audio track from a video (from Youtube)

All of the popular streaming services already use some kind of volume matching. But… It’s based on the loudest part and it’s one adjustment to the entire file so the quiet parts remain relatively quiet and the loud parts remain relatively loud, as the original performance was originally intended. And, they won’t push the levels into clipping so some quiet programs will remain quiet.

I have googled for a tool to show the volume of a file, but have not been able to find one that will show me what the actual volume is for a particular file

The [u]Loudness Normalization[/u] effect will adjust to a specific (digital) loudness. (
remember to be careful about clipping.)

There is a 3rd party plug-in called [u]dpMeter 4[/u] that can measure loudness, and also loudness range which could be helpful if you want to even-out the volume of a program.

The problem is that each source is different in volume and so some results are quieter than others.

There are 3 variations of dynamic compression, which makes quiet parts louder and/or loud parts quieter. Most often, compression “pushes down” the loud parts, and then make-up gain is applied to make “everything louder” They generally require some human interaction to make sure you don’t mess-up the sound quality -

There is a [u]Leveller[/u] effect is a kind of slow compression. That can work pretty well with dialog but it’s generally not something you want to use with music. (It’s classified as a “distortion” effect but when used carefully it doesn’t sound like distortion.)

The [u]Compressor[/u] effect is the “standard” tool for evening-out the volume. The 3rd-party [u]Chris’s Dynamic Compressor[/u] is also very popular.

The [u]Limiter[/u] effect is a fast kind of compression that “pushes down” the peaks (or the loudest parts). Again, it’s normally used with make-up gain to bring-up the overall volume. There are fewer options so it’s easier to use than regular compression and you are less likely to damage the sound (although it can be over-done). You can also use limiting after Loudness Normalization (but before exporting) to prevent clipping.

Not available in Audacity 2.2.2 (the version of Audacity that is included in Debian Buster), hence my suggestion to use the ReplayGain plug-in.

Steve, DVDdoug,
Thank you for your explanations and suggestions. I will give them a try as soon as I can. I have to take her out to the dentist and then I have a meeting tonight so it won’t be until tomorrow.
Ole.

Steve,
The Compressor Effect made things a lot easier to get the levels consistent. After Compressing, I just had to select a few loud spots and reduce the amplification and it comes out quite good.
I haven’t tried the “New Version” yet, but will have a go at that tonight.

Doug,
As Steve mentioned, I can’t use the Loudness normalization on my system, so I was unable to try that. Sounds like it will be useful when it is available on linux.
The dpMeter4 is also not available on Linux so I wasn’t able to try that.
I haven’t tried the Limiter Effect yet. It took a while to find it and I have to go out again.

Steve and Doug,
I really appreciate your assistance. It has made the process significantly simpler.
Thanks so much.
Ole.

The plug-in that I linked to does a very similar thing to the “Loudness Normalization” effect.