Fixing Clicks Between Tracks When Combined into One

greetings,

using audacity 2.0 on vista here, i’m trying to combine multiple tracks, which I have edited so as to have no breaks into one track (combining multiple movements of a classical symphony produced attacca - without breaks but separated, into one track). while it should play fine on a player, when i copy and paste (or use time shift), the transitions between (end of previous and start of next) is unclean in audacity - has a click. sometimes i can edit this out by isolating and magnifying it, applying fade out at the end of the previous track and fade in at the start of the next track but this is an inconsistent and strenuous method especially when used on sections that are soft (where there are no seen waves to distinguish). i was wondering if there is an easier way to remove the clicks or smooth out the transitions.

sorry this is kind of difficult to describe but i can elaborate if my description is unclear. any feedback or assistance is greatly appreciated.

No, we got that. People go on and on about matching waveforms and direction of transitions…

http://www.kozco.com/tech/audacity/pix/BadAndGoodEdit.jpg

…(bad on top), the most trouble you can get into is to not match the DC levels of the waves.

http://kozco.com/tech/audacity/pix/DCOffset.jpg

A seemingly minor vertical shift like that will always cause a significant click or pop in the show. The solution is to Effect > Normalize > Remove DC to each segment before you start editing. After you have a popping show, it’s too late.

You may be able to get it down to which work is popping of all the clips and only filter that one source. “The clips I got from George in Atlanta always pop no matter what.”

If you need to fix it in post production, it’s a lot harder. You can do a fast crossfade between the segments or a quick fade to zero and then back up.

As you found, you can also carefully with extreme zooming, delete a 1/2 cycle of waves (like the illustration) so the direction of the waves matches.

There’s no automated way to do this. Highly recommended to fix this before the edit.

Koz

If you use cut and paste, select all the first track then try Z (Find Zero Crossings) followed by Edit > Remove Audio > Trim.

Do the same with the next track then Edit > Remove Audio > Cut after the trim. Click in the first track, K to move to the end of that first track and paste there.

If this is a stereo recording it will not always prevent a click but it will prevent some of them, so save some manual effort.

Cross fading (sliding one track under the other then fading out the overlap that is ending and fading in the overlap that is starting) will almost always prevent clicks. There is a page in draft here that may help:
http://wiki.audacityteam.org/wiki/User:Stevethefiddle/Fade_and_Cross_Fade#Creating_a_Crossfade .


Gale

One of my problems is that i cannot see the waves:

the only popping i want to fix is between tracks (that occurs in transitions). The black line indicates where it is popping.

Can you be a bit more specific please? I highlighted the section and after i clicked okay on “normalize any DC offset” (with default on -10 dB), i was finally able to see the waves. I can try to edit from here but this section would be much louder than the rest even after correction. How do I change it back to its original volume (after editing?) And what exactly do you want me to do before I edit? Did you mean I should be “normalizing” everything? I’m trying to edit 5 tracks into 1 and am really just having trouble with the last 2 tracks (so I fixed 3).

I did this but am unsure if anything happened…am I supposed to notice changes?

Sorry i don’t see a “cut after the trim” option under remove audio. If you meant manually, i’m not sure where to cut. When I use time shift and drag the next track over, i make sure there are no spaces in between or after (it’s right up against the previous) but a click is there nevertheless (which is puzzling to me because it’s not in a player).

Questions:
When I usually copy and paste before, I open multiple files and copy it all onto one track. Should I be dragging files onto one project and then copying them all onto one horizontal track? or leave them under several tracks? What are the advantages of doing this?
Also, can someone explain to me the main difference between fade and crossfade? I usually use fade but it seems most of you prefer crossfade.

I’m a little confused right now being given multiple suggestions of solving this problem. I realize there’s more ways than one but I don’t know which to follow and where to go. Would really appreciate a clear step by step instruction if possible.

Thanks for the help so far, I’m finding this quite informative.

Can you be a bit more specific please?

We had the bad form to include DC level correction inside the Normalize tool. You don’t actually want to normalize anything. That will change the loudness. I should have been clearer. You only want the DC removal tool.

Gale’s suggestion was a more automated way of getting the up and down rhythm of the blue waves to line up.

I’m fascinated why you can’t see the blue waves. That’s basic to editing, processing, and filtering.

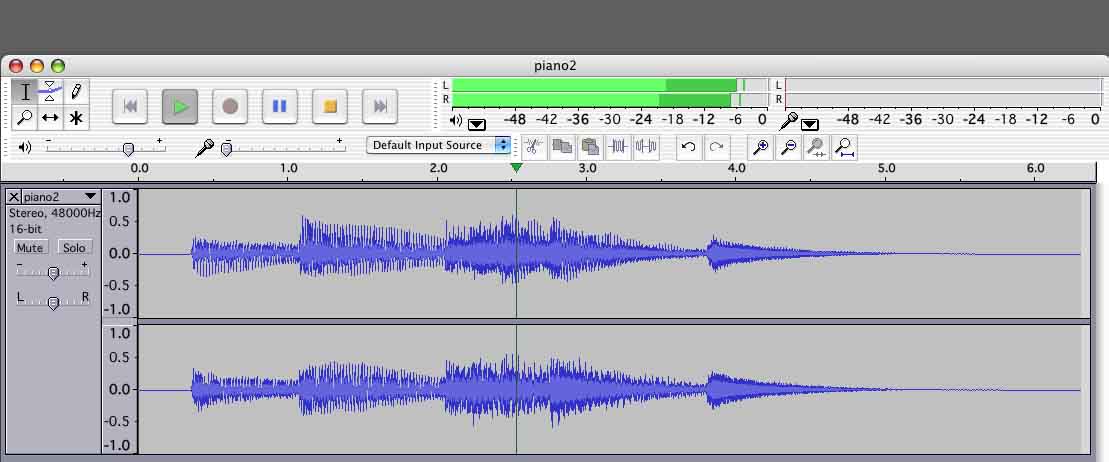
When you’re playing a clip, doesn’t your timeline look something like this?

Koz

There are two problems and we can’t tell where your popping is coming from, so we’re trying to solve everything. DC Level Problems are when you stop talking and the blue waves do not settle at 0 but either too high or too low. That’s what Remove DC fixes.

That first illustration with the gentle up and down waves uses a pure tone like a flute as an example. Your voices or music are going to be much more complex and harder to deal with. That’s why you should try editing clips with the DC removed first because trying to edit individual waves within a musical selection can be very difficult.

A straight Fade is like turning the volume on your radio down to nothing. A crossfade is turning your radio down and your TV up at the same time. That’s the two sentence explanation.

Koz

DC offset removal should be done straight after importing the files, just in case there is any offset. To do this, CTRL + A to select all the tracks, then Effect > Normalize with only the DC offset box checked.

Find Zero Crossings, Fade Out/ In and Cross Fade are all alternatives. The zero crossings method is automated so may save you time if it works (on mono recordings it mostly will work).

Fade Out / In are OK if the fade is short enough that you cannot hear it or if there is a natural break where you can make the join. I can think of a lot of attaccas that are across held notes, so the last thing you want is to hear a fade, and if the fade needs to be short that is extra effort zooming right in. Cross Fade IMO is the most reliable way to avoid a click.

Even if all your transitions are quiet, you may need to zoom in far enough to see the sample dots to be sure that a manual fade does not create a discontinuity.

Find Zero Crossings moves the selection boundaries a short distance so that each boundary lies on a sample that is at zero amplitude. You won’t see the boundaries move unless you are zoomed in a long way.

Trim removes everything outside the selection so has to be done on the first track (after the Find Zero Crossings command), so that the end of the first track is at a zero crossing.

You don’t have to do the Trim on subsequent tracks, but it avoids leaving any confusing bits of audio behind in the track you are cutting from.

So if its easier for the subsequent tracks, just do Z, then CTRL + X (the shortcut for Edit > Remove Audio > Cut). This cuts the selection to the clipboard and removes it from the track you were working on. Then click in the first track, K, then Edit > Paste (CTRL + V) and test the join. You can of course Edit > Copy (CTRL + C) instead of cutting, though I find it easier to cut so I can see which tracks have been dealt with so far.

It’s because the audio sample at the end of the first track and the sample at the start of the second are at different amplitude levels, making a discontinuity. If you click at the join and zoom in as far as you can you would see this.

If you want to cross fade with the current tools you must have the audio in separate tracks.

If you join the files into one track but find one join requires a cross fade, you can do Tracks > Add New > Audio Track (or Stereo Track) to make a new empty track, then use Time Shift Tool to slide the clip following the click downwards and sightly underneath.


Gale