It has negative DC offset because the overall sum of samples below the 0.0 centre line outweighs the overall sum of samples above the line.
For “DC” offset we are interested in the net value of all the samples. By definition, “DC” is a “constant” value.
For a signal that has no DC component, if we add up the values of all samples, the total is zero. This is how the Audacity DC offset removal works - it adds up all of the sample values and calculates the average sample value (which is zero if there is no DC offset). If the average sample value is not zero then there is a “DC offset”.
Quick definition: “DC offset” is how much the average sample value is offset from zero.
Coming back to your definition:
“has negative DC offset because in any given length there is a greater number of samples below zero which outweighs the samples above zero”
there is a potential problem:
What if the “average sample value” in the first half of the audio is different to the average sample value in the final half of the audio?
Overall, the samples may balance out (no DC offset), but if we look only at the first half we would see DC offset, and if we look at the second half we would see a different DC offset. This is where the Audacity DC offset falls down.
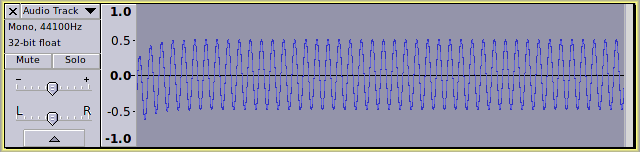
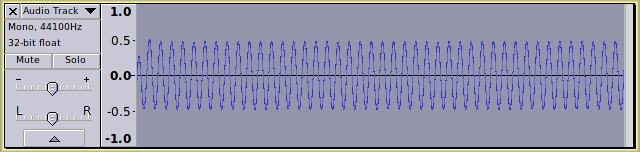
As an illustration, consider:
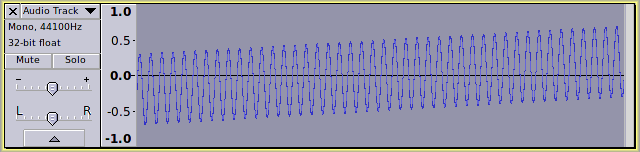
If we apply DC offset correction to the first half of the track we get:
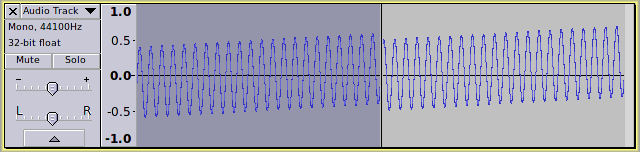
and if we then apply DC offset correction to the second half of the track we get:
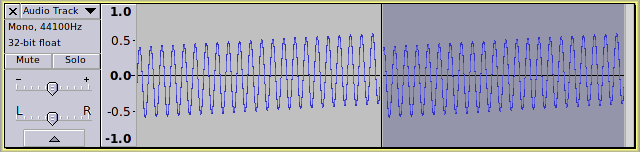
but if we applied DC offset correction to the entire track, then we would have (no change):

The problem here is that there is a gradually drifting offset, but overall the offset is zero.
The DC component (overall) is zero, but we can clearly see that there is a negative “bias” at the start of the track which gradually becomes a positive bias at the end of the track.
What my “Dynamic bias adjustment” does is to look at a rolling average rather than an overall average. The period for each subset of samples must be great enough to not be influenced by low audio frequencies. The result of "dynamic bias adjustment looks like this:
To complete this series of illustrations, this is the effect of the high-pass filter method: