Hi All,
I digitised some of a cassette tape of my band’s rehearsal in the 80s. The recording was always terrible and unlistenable, because the microphone was completely overloaded and it came out mostly as broken up noise!
But I’m starting to feel like Gene Hackman’s character ‘Harry Call’ in the movie ‘The Conversation’ now, revealing hidden sounds from a wall of noise. Adjusting things and the music is actually resurfacing again! It’s sounds horrible, and I’m not expecting miracles—just want to get some improvement—but it’s amazing how reducing some of the noisier frequencies instantly makes a difference.
I’ve tried the following, and I’m wondering is there a rule-of-thumb order to do them in?
Amplify (auto, no clipping)
EQ (amazing, but made all the waves shallower. Quieter?)
Had a go at Normalise (waves got taller again)
Noise Reduction (for laughs. All got shallower again)
Amplify again (because I have no idea what I’m doing)
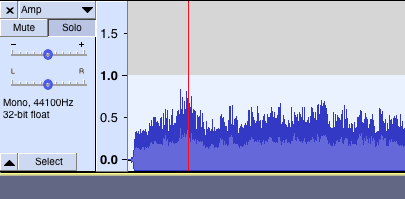
Also, sometimes, seemingly for no reason, the sound waves drop down in the track like the attached. Any idea why? Is it because I swiped over my apple magic mouse?
Thanks folks, please forgive my ignorance about this stuff.
John
I really don’t know if it’s better to run noise reduction before EQ or the other way around. Maybe someone else has some advice…
The thing you don’t want to do before noise reduction is to make different changes to different parts of the recording, and you shouldn’t apply compression which tends to make everything louder and pushing-up the background noise, especially during the quiet parts. Noise reduction works best if the noise is consistent.
Amplify & Normalize are both linear volume adjustments so it’s not too important when you apply them.
By default, the Amplify effect will adjust the volume up or down as needed for “maximized” 0dB peaks. That’s another way of normalizing.
It’s generally a good idea to normalize as the last step, no matter what you’re doing. The “catch” is, although all normalized files have the same peak level, they don’t always have the same perceived loudness. If you have an album and you want to maintain the relative loudness between tracks you need to have one file and normalize it as a whole. Or, you can normalize (“maximize”) all of the files individually and then adjust-down any tracks that are “too loud”.
EQ can push the peaks over 0dB. That’s not a problem for Audacity itself because uses floating-point internally and it has no upper (or lower) limit. But, 0dB is the “digital maximum” and you can clip your DAC during playback, and if you export as a “regular” WAV file or if you make a CD, those formats are hard-limited to 0dB and they will clip if you “try” to go over. Normalizing or the Amplify effect can bring the level down if necessary. Or they the can boost the levels.
Noise Reduction (for laughs. All got shallower again)
That’s odd, but of course the main thing is the quality of the sound. If it’s changing the appearance of the waves I’d guess it’s messing-up the sound. But if it sounds better and you re-adjust the volume later, digital volume adjustments don’t affect the sound quality (as long as you keep it linear and don’t push it into clipping/distortion).
If I’m just using EQ to tweak the tonality, I’ll generally do that after noise reduction.
If I’m using EQ as a corrective tool (for example, to reduce low end rumble, then I’d generally do that before noise reduction (which means that the noise reduction does not need to work so hard).
Noise reduction should have virtually no affect on the overall level. If it does, then you are probably using a bad “noise profile” (one that contains “signal” as well as “noise”), or you are applying far too much noise reduction.
Noise reduction is only suitable for “reducing” (not “eliminating”) constant, low level noise.
You know at the end of the tape where you hear that background ffffffffffff sound? That’s what you use Noise Reduction for. And even then if you overdo it, it may make some of the music sound a little talking in a milk jug. Noise is not “Everything I Don’t Want.”
As DVDdoug above,we can’t split a mixed performance into individual instruments, voices, and sounds. So there is no getting rid of most traffic noises or that TV in the background.
the microphone was completely overloaded
That gives you #2.
The thing that creates the problem with overload is not just the distorted crunch. There are portions of the performance that just didn’t get recorded. There’s nothing to “clean up.”
There is a special Hollywood trick you might be able to use. Take your smartphone in your dominant hand, call the original people and play it again. If that fails, get stand-in musicians to simulate your original performance.
If you use the stand-ins, call the original artists and say, “Do you remember those garage songs from 1983? I found some good tools to clean them up.”
As for your screenshot of the track - yes, you’ve clicked/swiped over the vertical scale. Right-click on the vertical scale and select “Zoom reset”.
– Bill
Okay, I should have realised that ‘noise’ refers to like tape hiss or whatever. The racket and distortion in this recording completely obscures any of that! It’s the least of my problems.
So there was a mention of EQ boosting the volume, I think. I can imagine that happening if I boost the big lower frequencies for example, like bass guitar etc. And if that’s the case, should I just make sure that nothing in the wave goes red?
I’m still not sure whether to ‘Amplify’ before or afterEQing. When I Amplify, I tend to go with the automatic max, by leaving the ‘allow clipping’ box unticked.
As the next/final step then, once I think I’ve got the quality as good as I can with EQ, without red-clipping visible, should I go ahead and Normalise?—or just use Amplify again? (I think it was suggested that they’re pretty similar things)
I’m sure there’s a tonne of other stuff that can be done but I don’t want to get too complicated, trying to walk before I crawl.
Sorry if I’m asking the same questions (I hope I’m not),
John
If it does go into the red, just run “Amplify” with default settings to bring the level back down to the legal range (assumes that your track is the default “32-bit float” format).
Apply “Amplify” whenever necessary. The default settings will bring the peak level to 0 dB (the “legal” maximum).
Many people advise amplifying to a little below 0 dB immediately before export so as to allow the playback equipment a little headroom. The “Normalize” effect is a convenient way to do that - by default it will amplify to a peak level of -1 dB (just a little below the max “legal” level).
Thanks Steve.
Much clearer now. I’ll give it a go.
I wish it was possible to use the EQ sliders while the sound is playing, instead of making an adjustment, clicking ‘preview’, then making another adjustment, preview, over and over.
If you use the stand-ins, call the original artists and say, “Do you remember those garage songs from 1983? I found some good tools to clean them up.”
Since you’re on a Mac you can use the Audio Units effects which support real-time preview.
Go to Effect > Add / Remove Plugins. Scroll down to the AUGraphicEQ, select it, click the “Enable” button then the “OK” button. Now you can bring up the AUGraphicEQ, start you track playing and adjust the EQ settings in real time. When you have found a setting you like you can save it as a preset.
I found that after EQing, and getting the best that I can get (but with loads of red peaks), I use Normalise or Amplify and the track is killed off again and made really quiet and dull.
So I undid that and this time, after EQ, I tried Compression instead, at default — which removed most of the red peaks but preserved the effect of the EQ — and then I used Normalise. This time around, Normalise preserved the EQing and the track is still loud.
I’ll just emphasise again that this recording is a grating, distorted, overloaded mess — even after all of this — but what I’ve revealed just with EQ is amazing.
I’m serious. Changing the volume of a track cannot change the inherent sound quality.
Things that are louder are generally perceived to sound “better”. That’s why it is vitally important to match the levels of two different sound sources when comparing them by ear.
That said, there may have been some clipping and/or distortion on playback of the overloaded track, caused by the (probably) 16-bit digital-to-analog converters in the Mac. That would result in a change in sound quality (for the better) after applying Amplify or Normalize. On the other hand, that clipping can make the track sound “brighter” (because the clipping artifacts are mainly in the high frequencies).
You can do a direct comparison of the track before and after normalization.
Duplicate the track
Apply Amplify to the duplicated track - make note of the exact amount of amplification
On the original track double-click the track gain slider and enter the amount of amplification applied to the duplicate track
In Preferences > Tracks Behaviors set the Solo Button to Simple
Click the solo button on the original track, listen for a bit, then click the solo button on the duplicate track. What do you hear?