Toning down the hardness often helps with this.
Version 1.1 doesn’t have a “hardness” setting. Is the “Compress ratio” in 1.1 similar to “hardness” in 1.2.6?
Gale
The early versions of Chris’s Compressor had problems with leading and/or trailing words. The “Look-Ahead” system didn’t understand beginnings and endings. He was aware of this problem. I don’t have that problem with 1.2.6 – that I can tell.
Koz
Thanks for the link theRamenNoodle. I changed your description from “latest version” to “Compress dynamics 1.2.6” because Chris released version 1.2.7.b1 shortly before his death.
Chris’s compressor 1.2.7.b1 is available here Chris’s compressor 1.2.7.b1
This version is open source (MIT license). It includes some new experimental features on top of the previous 1.2.6 code that are not fully developed, so for most users the 1.2.6 version is probably better.
We don’t host the 1.2.6 version as it is not open source and licensed “all rights reserved”*, so if anyone wants to polish up an open source version of Chris’s compressor it should be derived from the 1.2.7.b1 code.
*The license terms of the 1.2.6 version:
;;Authored by Chris Capel (http://pdf23ds.net)
;;All rights reserved
;;Permission granted for personal use, without redistribution.
I understand that “theaudacitytopodcast.com” (theRamenNoodle) has been granted rights to distribute.
Chris’s father transferred all of Chris’s project, website, and notes to me for hosting on The Audacity to Podcast. So I can also add a link to the beta version and I’ll host any updates that anyone wants to contribute.
So sorry to necro this thread after 3 years, but I didn’t know where else to put this question.
I want to “upgrade” from the standard built-in Audacity compressor to this one but I am having trouble translating the settings.
Most compressors have a ratio of compression, like 1:2, 1:4, etc. This one however has a decimal. .8, .5. etc.
A straight mathematical translation doesn’t seem to make sense to me, as I have seen recommendations for this plugin around .75-.8, but as a ratio that would be LESS than 1:2 (which would be .5) so I’m assuming the two methods can’t be mathematically correlated.
I have seen success using about a 1:4 compression in my work. What would be the equivalent in this plugin?
Finally, a bit off topic, but I want to remove or reduce breathing noises but don’t want something as clumsy as a noise gate. I currently have my noise floor in the regular Audacity compressor to -40. Would setting it to -35 or -30 (in either compressor) improve this without causing undue distortion? What would be the optimal settings for this in Chris’ compressor?
Thank you!
Yes I have. I saw that before coming here. That guy talks about the settings he uses but he doesn’t explain anything from a technical standpoint and doesn’t translate the settings to the standard Audacity compressor, which is the question I was asking.
I don’t think you can get easily from one set of tools to the other. The compressors and limiters started with the code, programming and development and worked down to sound. Chris started with opera in his car and worked up to code. They’re very different tools.
I like to listen to an NPR radio production while hiking and I was fine when I was recording the off-air show from a receiver, but it was noisy with FM Stereo hiss. So now I download the podcast. The two performers have very different vocal styles and one in particular mumbles in his beer on occasion followed by a thermo-nuclear detonation laugh. It’s impossible to listen to, IMHO. The FM radio transmitter compressors took care of that.
Chris to the rescue. His goal was to able to listen to wide volume range opera in the car with minimal distortion or damage, so the tool incorporates all the compressors, limiters and look-ahead processing needed to do that. I use it with the first value, Compression changed from 0.5 to 0.77 and the resulting personal sound player show is indistinguishable from the FM broadcast.
I know of no combination of individual effects tools, processing or settings which will do that. I have never found it desirable to change any of the other settings, but there is one gotcha in 1.2.6. It hates leading digital zero. So when I cut the show down for my iPod, I leave a half-second to one second of interstitial radio network voice messages at the beginning of the show and cut everything else to final. Then Chris Compress with the revised setting and when it’s done, go back and slice off that half-second.
It’s perfectly possible to run Chris with the original 0.5 value. The show will be looser with more expression and volume variation.
This is the original show, default Chris value of 0.5 and the revised setting of 0.77.

Koz
I want to remove or reduce breathing noises but don’t want something as clumsy as a noise gate.
Post some of the voice work you think is too gaspy. Twenty seconds WAV mono or ten seconds of WAV Stereo. Scroll down from a forum text window > Upload attachment > Browse.
You can do it in MP3, but we’d rather you didn’t.
Koz
An interesting problem, indeed.
You forgot to mention the normally used threshold, which doesn’t seem to be used at all (for compression, not the noise floor).
At least, I can’t make it out in the code.
The compression level is directly applied to the envelope values in dB.
This suggests an upwards compression.
For instance:
Let’s assume that we have two samples at different times -1.0 and 0.1.
They happen to be the peaks within the time frame (the length of the overlapping frames/windows is determined by the hardness, by the way).
To construct the envelope, we take the absolute values, i.e. 1.0 and 0.1.
We can now work with dB, instead of linear values (because we’ve eliminated negative values)
1 = 0 dB
0.1 = -20 dB
Our CL (compression level) is 0, the trivial case:
0 * 0 dB = 0
0 * -20 dB = 0
Those are the new compressed envelope points. we must translate them back to linear, which gives simply 1.0.
Before we multiply with the original sound, we must divide 1 by this value–gives still 1.0 in both cases.
Thus, the new samples are:
1.0 * -1.0 = -1.0
1.0 * 0.1 = 0.1
In summary, a level of 0 won’t change our original sound.
Our next compression level is 0.5 and we multiply the previously found envelope values (dB) with this factor:
0.5 * 0 dB = 0 dB
0.5 * -20 dB = -10 dB.
Back to linear:
0 dB = 1.0 → 1/1.0 = 1 (factor)
-10 dB = 0.3168 → 1/0.3168 = 3.168
Those factors are going to be multiplied with the original samples:
1.0 * -1.0 = -1.0
3.1682 * 0.1 = 0.3168
You see, the lower sample value is now much higher and that’s why I called it upwards-compression.
And what ratio does this translate to?
There you have me… ![]()
The missing threshold is a bit confusing, I have to admit.
Let’s assume that it would be -40 dB.
Difference to 0 dB = 40 dB.
After the above calculation with the factor 0.5, the sample value would be at -20 dB and we amplify by this amount to get back to the original -40 dB, i.e. the sample value would still be 0.01.
However, the value of 1.0 (0 dB) would newly be 0.1 or -20 dB.
The new difference is therefore -20 dB - -40 dB = 20 dB.
Thus, the ratio is 40 dB : 20 dB or more common 2:1.
Let’s do it with the factor 1.0:
The initial difference is the same 40 dB.
All envelope points are essentially amplified by their (positive) value in dB. -20 by 20, -40 by 40 and so on.
This implies a ratio of infinity:1–as used by a hard limiter.
However, this is a bit queer since the plug-in allows values of 1.25 as compression level.
Very strange? Yes, it is because it inverts the loudness values somewhat. Low peaks (above the noise floor) will be louder than those that were previously already at full scale!!!
I will now make a guess in the wild as how ratio translates to the compression level.
Assumptions:
- 1:1 = 0.0 compression level
- 1:infinity = 1.0 compression level
possible formula: 1 - (inverse ratio)
sample calculations:
ratio 1:1 → 1 - (1/1) = 0.0
ratio infinity:1 → 1 - (1/infinity [approx 0]) = 1.0
ratio 2:1 → 1 - (1/2) = 0.5
ratio 4:1 → 1 - (1/4) = 0.75
ratio 10 :1 → 1 - (1/10) = 0.9
ratio 1:2 (expansion) → 1 - (2/1) = -0.5
ratio 4:-1 (inverse loudness) → 1 - (-1/4) = 1.25
Does this make sense? ![]()
Robert
that’s why I called it upwards-compression.
Most of our tools reduce the volume of the show according to the settings selected. Chris boosts volume and the produced show is louder than the original as well as volume adjusted to reduce differences in the content. It’s cousin is a broadcast processor.
Note two other Chris settings: “Where do you want me to put the peaks” and “Where should I give up so I don’t amplify the noise floor by accident.”
Koz
“The guy” on https://theaudacitytopodcast.com/ is me, by the way. ![]()
I’m quite sure I did explain what the different settings were, especially in https://theaudacitytopodcast.com/tap005-my-secret-audacity-recipe-for-great-audio/.
Thanks Daniel for putting this right.
I was tempted to do it myself as I read about “the guy…”.
Keep on doing great podcasts.
PS. As you’re actually hosting the plug-in, is there any interest for improving it?
Nyquist plug-in integration has a bit improved over the last years and CC’Dc could benefit from some Version 4 features.
Especially the strange behaviour for selection beginnings (see Koz’s comment above) is a major drawback.
Regards
Robert
Wow, thanks all. Kozikowski, thanks as always, you’re always insightful and helpful.
Ramen - Sorry, wasn’t able to put two and two together. Your blog was the most helpful I found anywhere on this subject, but I sometimes like to have something explained to me so that I can understand it rather than “here are my settings that work really well”. I get that the vast majority of people wouldn’t want what I want. ![]()
Robert, while I definitely had a hard time following everything in your post I did understand the conclusion, which is .75 is the equivalent to a 4:1 ratio. However, from further comments by Kozikowski I’m not even sure that Chris’ compressor even is a compressor in the traditional sense, as it boosts volume.
I think maybe I get too technical sometimes trying to break down a problem to it’s components and speak in shop talk (that while I understand the definition I don’t know all the ins and outs like experts/audio people like Kozikowski).
In essence, I record long stretches of audio, not unlike a podcast. Someone with more discipline can speak at the same volume level for 30 min, but I cannot. My ultimate goal is to reduce the peaks so that the medium level of volume is much higher (e.g. my voice), with the caveat though that the low volume is NOT increased (e.g. my breathing, rumbling stomach, keyboard click). I notice that before processing my audio these lower sounds cannot be heard but when I compress and normalize they can.
I am mostly frustrated that when you listen to the average gaming “let’s play” on Youtube the voice is always cymbal crashingly loud, but still sharp and clear, and you never hear clipping, despite the performer shouting and screaming a lot. I, on the other hand, rarely speak above a conversational level and even when I normalize to -1db my voice is still soft relative to theirs, (I have to turn the volume up on my speakers to get the same volume level) and should I scream at this level of volume it would horribly clip. The best way I have found to combat this is high level compression (I’ve gone up to 6:1, but 4:1 is where I’m usually). This improves the clarity and loudness of my voice, but as I said before has the unhappy side effect of also increasing every barely there sound to prominence as well.
Maybe the solution isn’t Chris’ compressor, but better settings on the standard one?
Thank you all so much!
I get that the vast majority of people wouldn’t want what I want.
Actually, they all want exactly what you want. Professional, Studio quality sound from your living room. But, I can hear you complain, I don’t need professional quality sound, I just need clear sound at good volume and no distortion or noise. Most professionals I know would kill to have that.
my breathing, rumbling stomach, keyboard click)
As I recently posted somewhere else, nothing is beyond the effects of writing a big check. This is my silly podcast test with Denise. This time pay attention to my voice rather than hers.
Sounds pretty much perfect, right? You have to take my word that it sounds like me. That keyboard tapping is Denise, not me, and I’m not in my studio. I’m in my living room fronting a busy street with the usual room echoes, ticking clock, toast popping and occasional guest appearance from LAX. So how did I do it? I’m wearing a noise cancelling entertainment quality head-mounted microphone such as this. That’s a TED presenter, but Las Vegas and rock concert people use similar equipment.

The goal is to see how close you can get the microphone to you without it sounding funny, then add graceful acoustic environment cancelling on top.
I also have a USB gaming headset with noise canceling microphone and it’s terrible. They went for stiff noise cancelling at the expense of voice quality.
I’m calling it $300 usd all in. The microphone and battery adapter is roughly $150, the analog mixer is $100 and the USB adapter is $30. Cables extra.
The microphone is actually in this picture but it’s hard to see.

I did have some advantages. Those two computers are older design Macs and my mixer will plug in directly. No USB sound adapter.
Live sound is not for the easily frightened.
Koz
There is no stone that says you have to use the computer. That’s my mic stand and personal recorder. Of course it’s no longer made, but it has a lot of terrific features. It would produce a WAV sound file and had “zoom” microphones. You could make it ignore a lot of room noises in favor of whatever you were doing right in front.

Then there’s the other personal recorder. This is Senator Graham demonstrating smartphone voice applications.
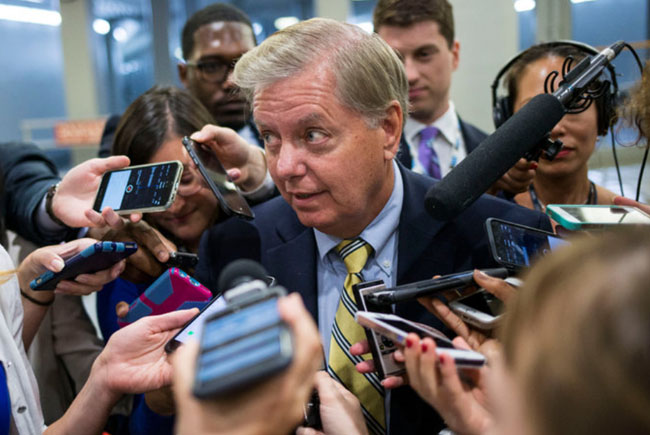
I get one shotgun, one personal recorder, two conventional microphones … and eleven cellphones.
Koz
Actually, they all want exactly what you want. Professional, Studio quality sound from your living room. But, I can hear you complain, I don’t need professional quality sound, I just need clear sound at good volume and no distortion or noise. Most professionals I know would kill to have that.
Haha, no what I meant was most people just want to be told “Set the plugin to these exact settings and you’ll be great” rather than have to take the time to truly understand what those settings mean and what they signify.
As I recently posted somewhere else, nothing is beyond the effects of writing a big check. This is my silly podcast test with Denise. This time pay attention to my voice rather than hers.
Wow that is great sound for a headset. I’m amazed. Usually you hear headsets are rubbish. And the price point honestly isn’t a whole lot more than some of the nicer USB mics like the Blue Yeti which I use. I don’t however like all the accoutrements (mixers, adapters, etc.) for pure clutter reasons. You’ve given me something to think about as my space is small and huge mic with boom stand is unwieldy when one also has to have a clear view of a computer monitor.
But getting back to the topic at hand, presuming I cannot move or get a new mic set up and that I don’t want to record using my cell phone, with regards to compression would setting the noise floor higher be a smart strategy to get the result I’m looking for or could possibly another one of the settings (threshold perhaps, I already have a pretty good grasp of what the ratio does). And finally, back to the beginning, would Chris’ compressor - properly configured of course - yield a better result for this purpose or not. RamenNoodle believes that for a podcast that it’s superior, from reading his blog entry on it.
Thanks!
Do you use version 1.27 b of Chris’ Compressor?
Anyway, this version has a fall-off setting for the noise floor as well.
Normally, it is set to 0 but a higher value expands the sound below the noise threshold. Properly set, it keeps your rumble and breath sounds low after compression.
You can see it like changing a linear ‘/’ kind of dynamics to a ‘S’ form.
I think one problem of the effect is that it acts on peaks and this might be bad for low-level noise, especially mouse clicks.
Chris proposes in a comment to engage a noise gate before applying his effect.
Have you tried Audacity’s limiter as a last step before exporting?
Robert